How to configure Earnsmart and setup route planner?
Installing web reporter
1. Go to Tools-->Add on products-->select web reporter (if menu not available then enable the menu from security manager and restart the application)
2. Click Download button from the showing screen.
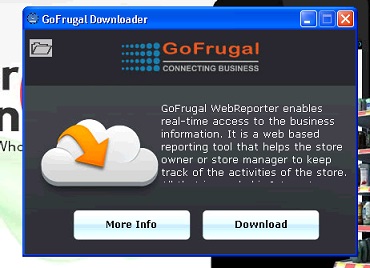
3. It will download the web reporter to install
4. After download it will show the following screen. In this click install now button to install the web reporter
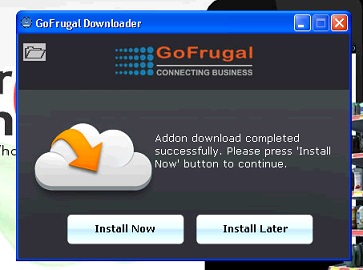
5. Wait until the web reporter installation.
Configuring Earnsmart
1.Before configuring Earnsmart make sure you have bought the "EarnSmart license". We also provide 30-day free trial of the application for you to experience first before purchasing
2.Go to Help-->About-->Click sync button. It will show the add on products available.
3.Now Click "Try and buy" near Earnsmart Android. It will activate the 30 days trial license.
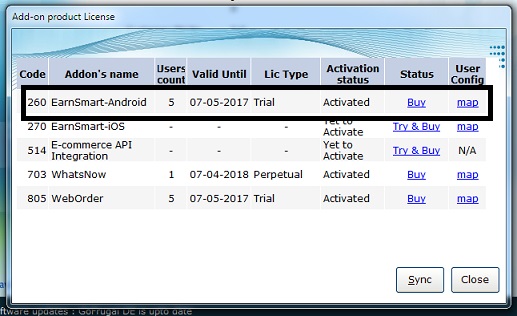
4. Go to Master-->Executive-->choose a rep-->go to login access-->choose Earnsmart(This can be done in both new creation of a rep or modify the already created rep)
5.Provide the password
6.Confirm the password
7.Save the rep
8.Now the password is sent automatically to the rep mail id if the mail id provides in rep master.
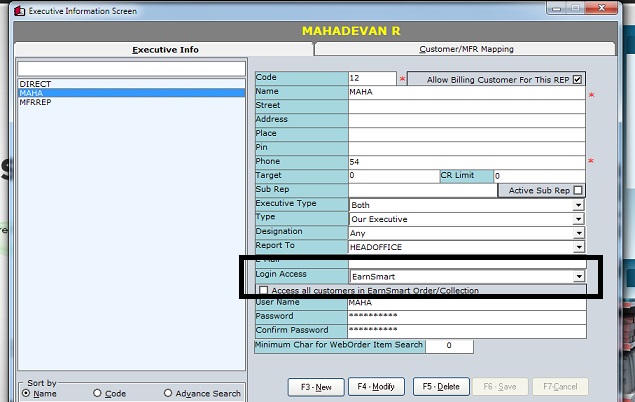
9. Now again Go to Help-->About-->Add on product license-->Click Map button on Earnsmart Android
10.Now the rep we configure for Earnsmart in Executive Master will show here.
11.Mark the tick on the status column in the respective salesman(rep or executive) and click Close button
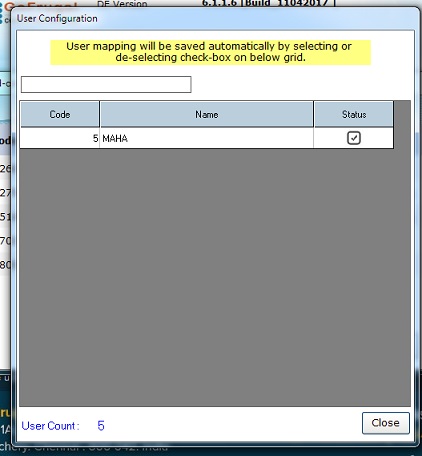
12. Now we can log in this salesman in Earnsmart App and enjoy the Feature of Earnsmart
Route planner for Reps in Earn smart :
I.We have given route planner for reps based on the Customers mapped for them in Earnsmart now
II. This Feature is available from 6252 version of DE.
III. first, we need to create a market beat, sales beat in area/beat master.
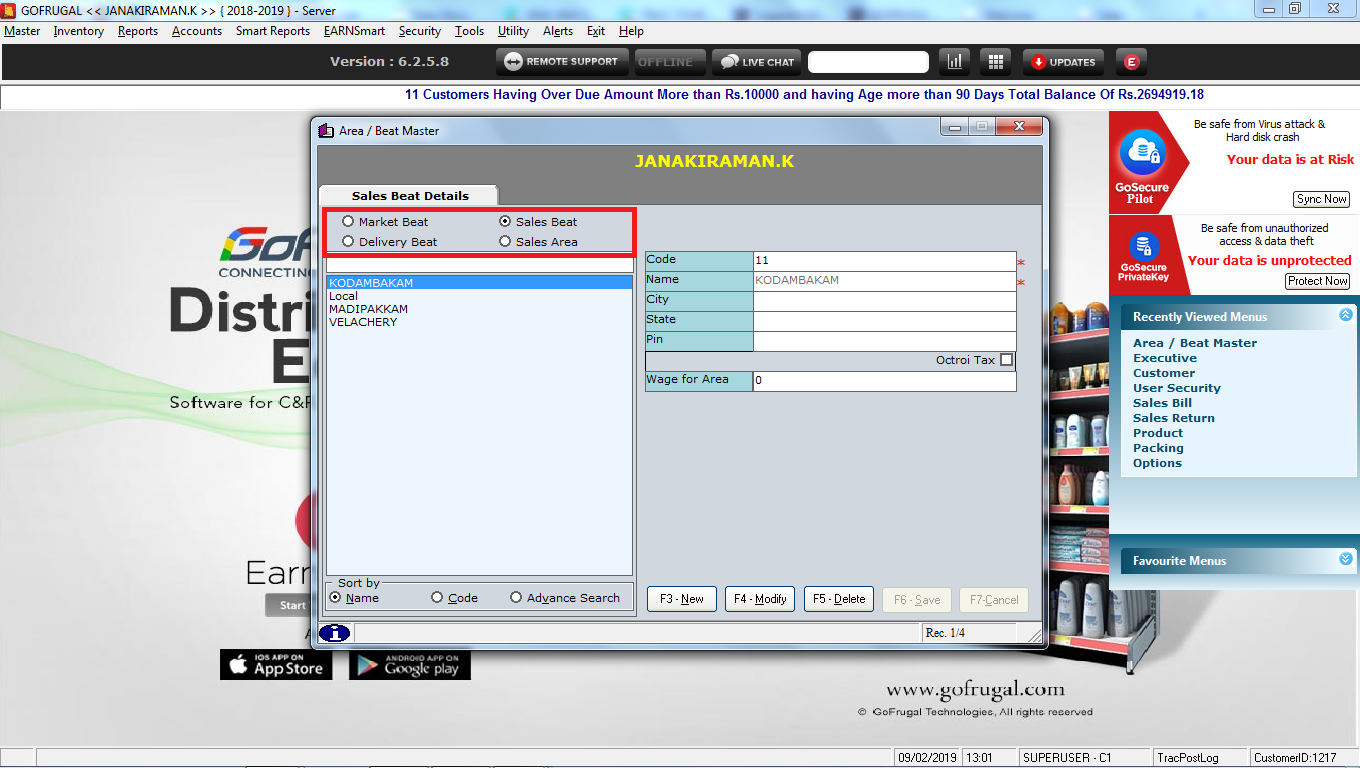
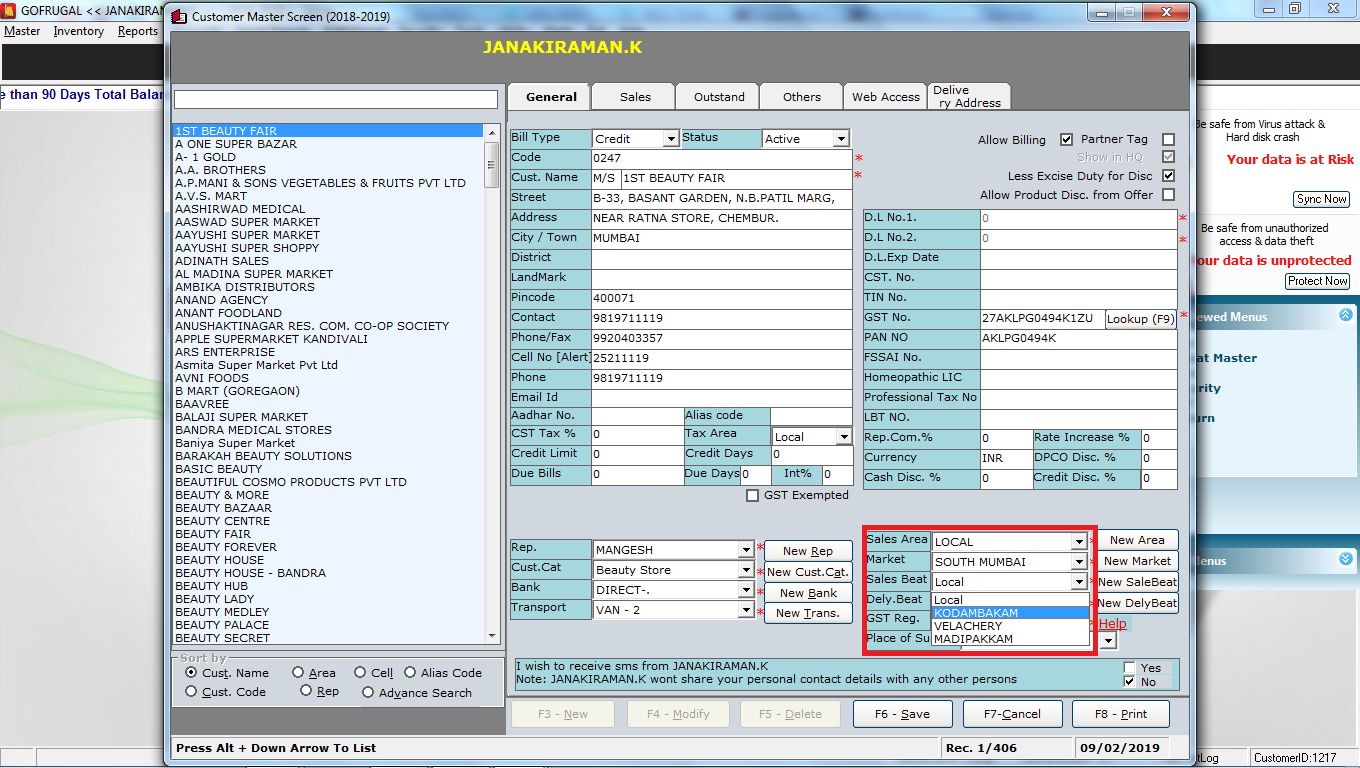
IV. map the Market beat/sales beat in customer master.
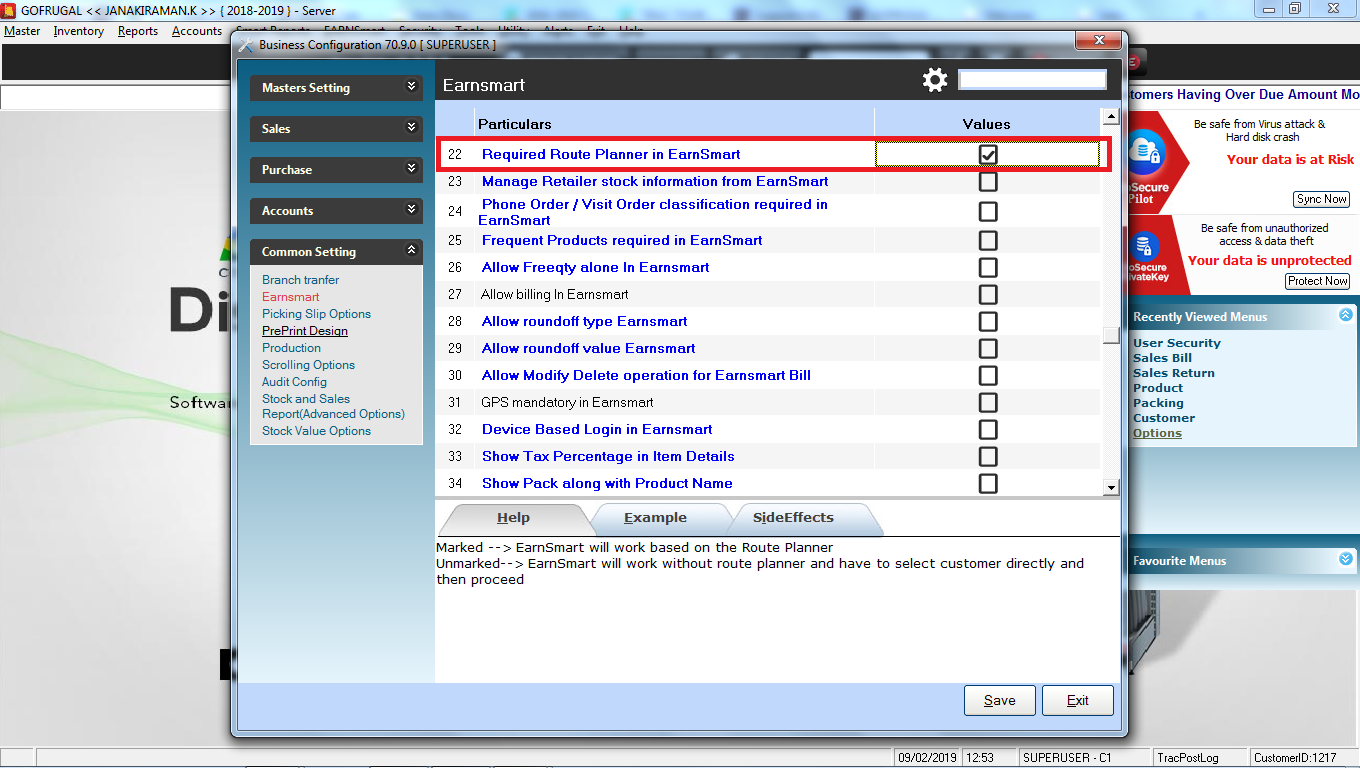
V.For this need to enable Required route planner in Earnsmart option.
VI.goto->tools->option->options->common settings->earn smart->Required route planner in Earn smart.
VII.Now after enabling this option we will get area/beat mapping window in Executive master.
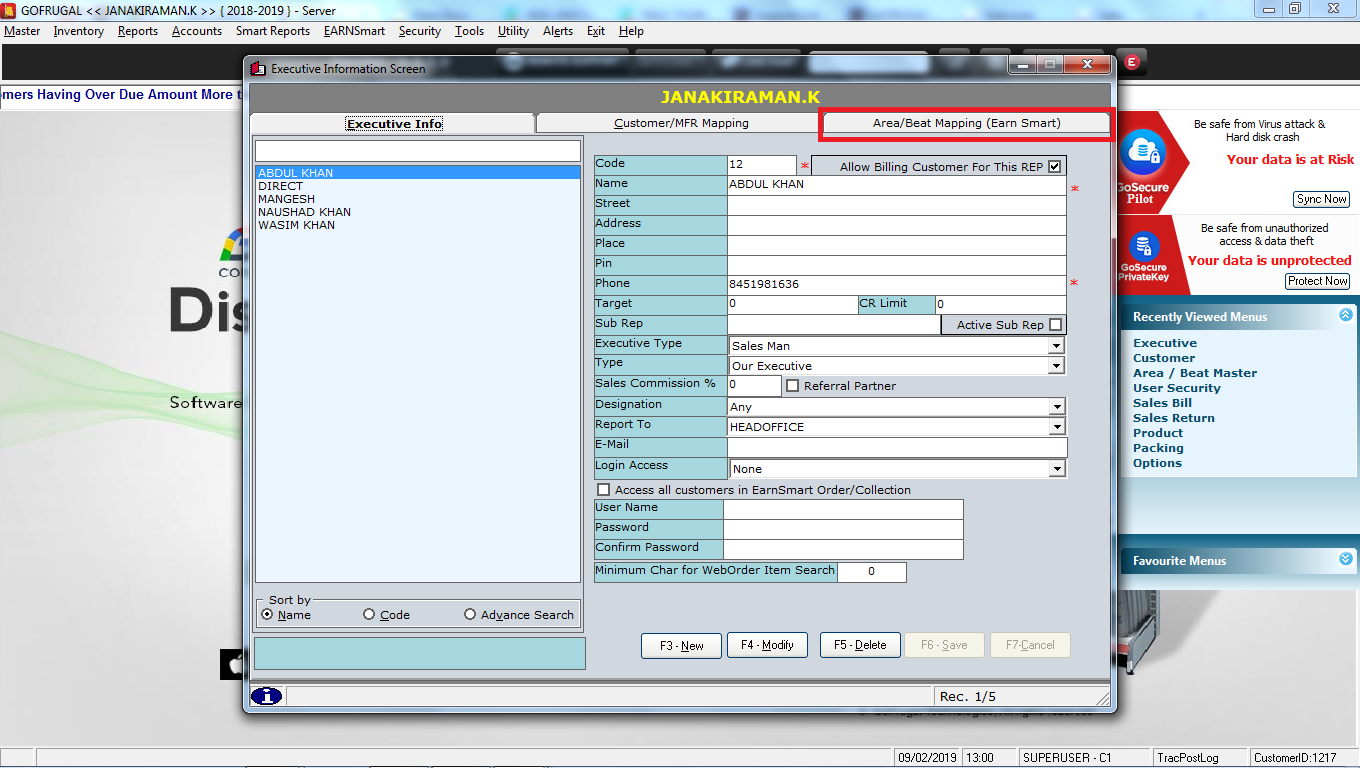
VIII.In this area/Beat Mapping (Earnsmart )we can give market area and sales area for the Rep based on days.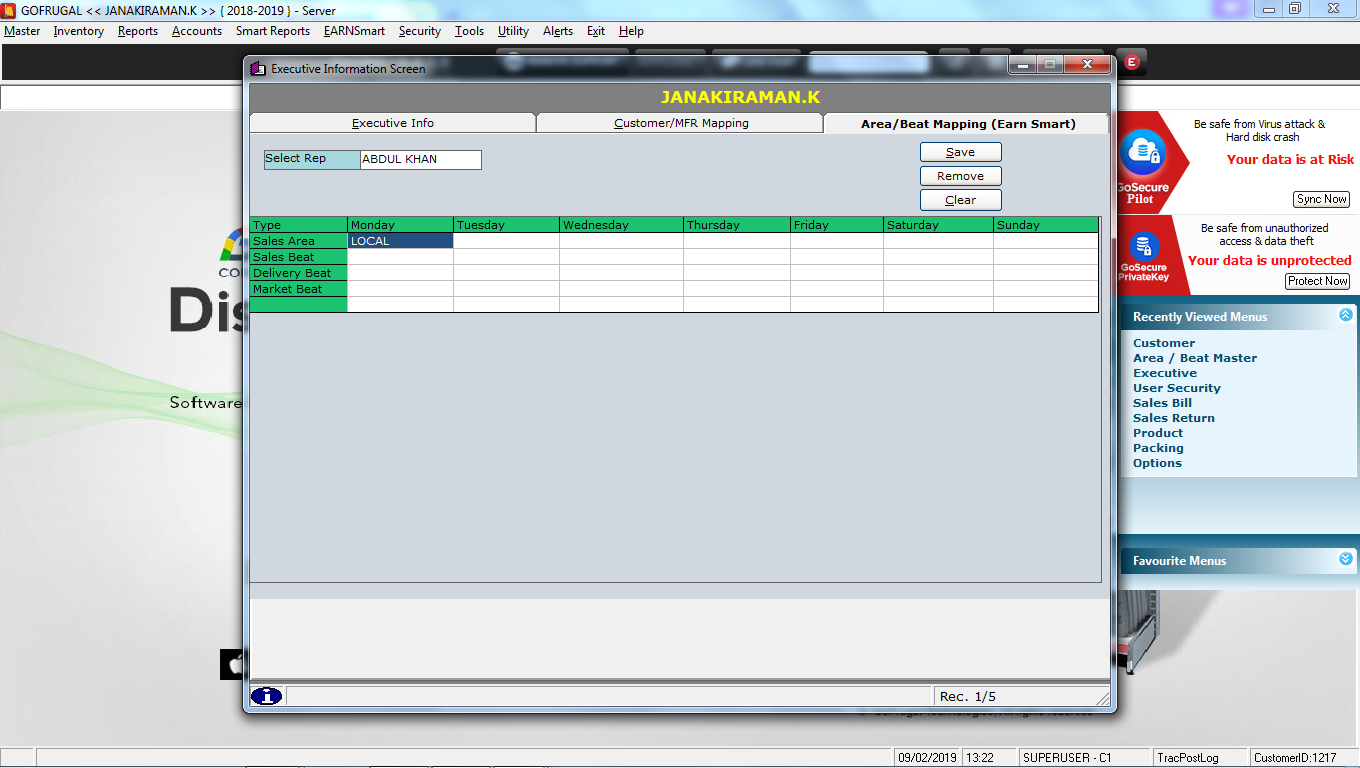
IX. Once area mapping is done, Need to sync in Earn smart once.
X. now for the reps only the customers mapped for that Particular area in a particular day will get a display for order and bill.
1. Go to Tools-->Add on products-->select web reporter (if menu not available then enable the menu from security manager and restart the application)
2. Click Download button from the showing screen.
3. It will download the web reporter to install
4. After download it will show the following screen. In this click install now button to install the web reporter
5. Wait until the web reporter installation.
Configuring Earnsmart
1.Before configuring Earnsmart make sure you have bought the "EarnSmart license". We also provide 30-day free trial of the application for you to experience first before purchasing
2.Go to Help-->About-->Click sync button. It will show the add on products available.
3.Now Click "Try and buy" near Earnsmart Android. It will activate the 30 days trial license.
4. Go to Master-->Executive-->choose a rep-->go to login access-->choose Earnsmart(This can be done in both new creation of a rep or modify the already created rep)
5.Provide the password
6.Confirm the password
7.Save the rep
8.Now the password is sent automatically to the rep mail id if the mail id provides in rep master.
9. Now again Go to Help-->About-->Add on product license-->Click Map button on Earnsmart Android
10.Now the rep we configure for Earnsmart in Executive Master will show here.
11.Mark the tick on the status column in the respective salesman(rep or executive) and click Close button
12. Now we can log in this salesman in Earnsmart App and enjoy the Feature of Earnsmart
Route planner for Reps in Earn smart :
I.We have given route planner for reps based on the Customers mapped for them in Earnsmart now
II. This Feature is available from 6252 version of DE.
III. first, we need to create a market beat, sales beat in area/beat master.
IV. map the Market beat/sales beat in customer master.
V.For this need to enable Required route planner in Earnsmart option.
VI.goto->tools->option->options->common settings->earn smart->Required route planner in Earn smart.
VII.Now after enabling this option we will get area/beat mapping window in Executive master.
VIII.In this area/Beat Mapping (Earnsmart )we can give market area and sales area for the Rep based on days.
IX. Once area mapping is done, Need to sync in Earn smart once.
X. now for the reps only the customers mapped for that Particular area in a particular day will get a display for order and bill.
Related Articles
How to setup your hardware?
Introduction Welcome to our guide on setting up your hardware. This document aims to help you understand the basics of hardware and the necessary steps to set up your system to ensure a smooth installation process. What is hardware? Hardware refers ...How to create customer in EarnSmart and perform sales return?
Customer Creation in EarnSmart: Step 1: To create a customer in Earn Smart, The minimum version of DE should be 6258. Step 2: Enable option called customer creation in earnsmart option under Tools->Option->Option->Common Settings->Earn ...How to configure Weborder?
Conventional manual method 1.Normally Distributors are calling to their customers and get the order via phone 2.Distributors reps are going to their place and write the orders and come to the distributor place and enter the bill 3.Distributors reps ...User Creation in ManageEasy
User Creation Creating a New User in ManageEasy: The purpose of Creating a new user in Gofrugal ManageEasy allows role-based access control, ensuring secure and organized operations. It helps assign specific responsibilities, improving accountability ...Restrict to create and modify customers in customer master
To Configure Path: Tools-->options-->options. Path: Tools-->Option-->Options-> Master setting. In Mater setting Enable the option to Restrict Creating, Editing and Deleting of Customers in Customer Master using spacebar. After Enabling the option, In ...