How do we stock count the serialised items in the Physical inventory screen?
Batch items - stock taking
1. Click Inventory >> Physical Inventory. The Physical inventory screen is displayed.
2. Press F3 or click New. The Physical inventory screen is displayed.
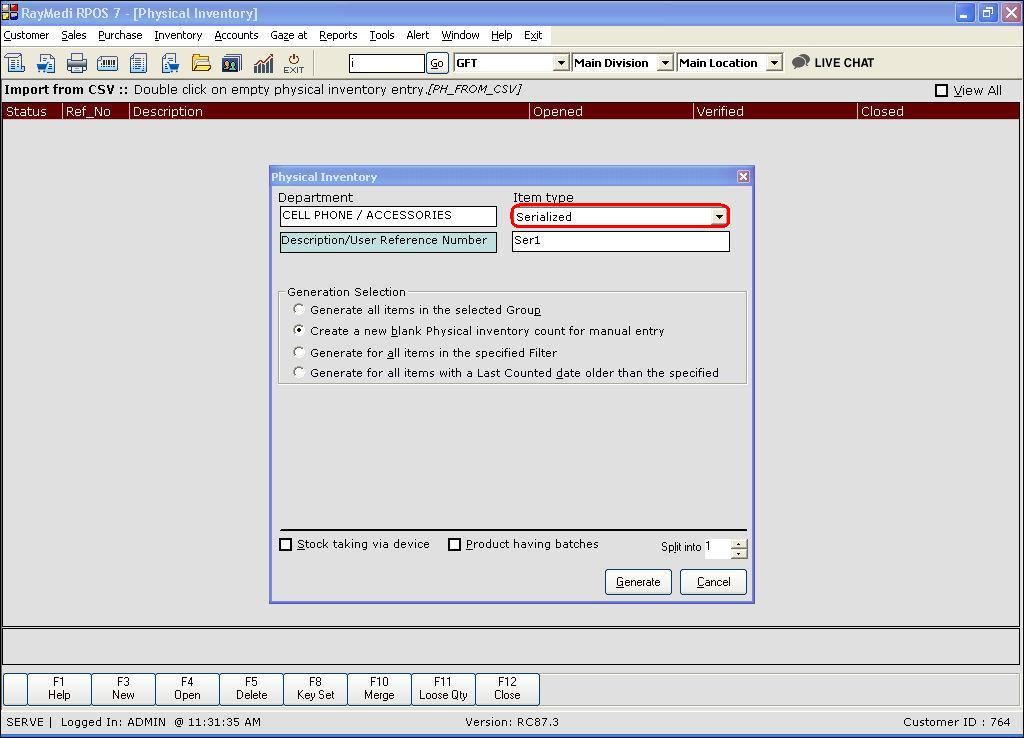
3. In the Item Type field, select the option Serialized.
4. In the Description / User Reference Number field, enter your description for the form.
5. In the Generation Selection section,the option Create a new blank physical inventory count for manual entry is selected for illustration.
6. Click Generate. A confirmation message is displayed. Click Yes. An entry for the above physical stock selection is created with a Reference number.
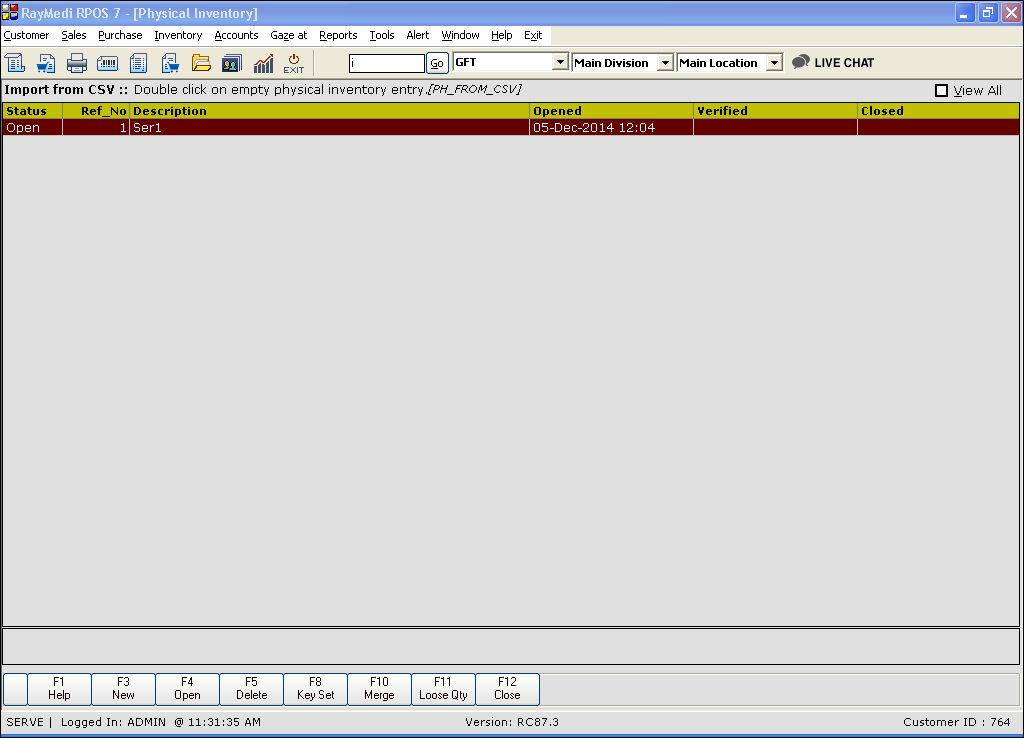
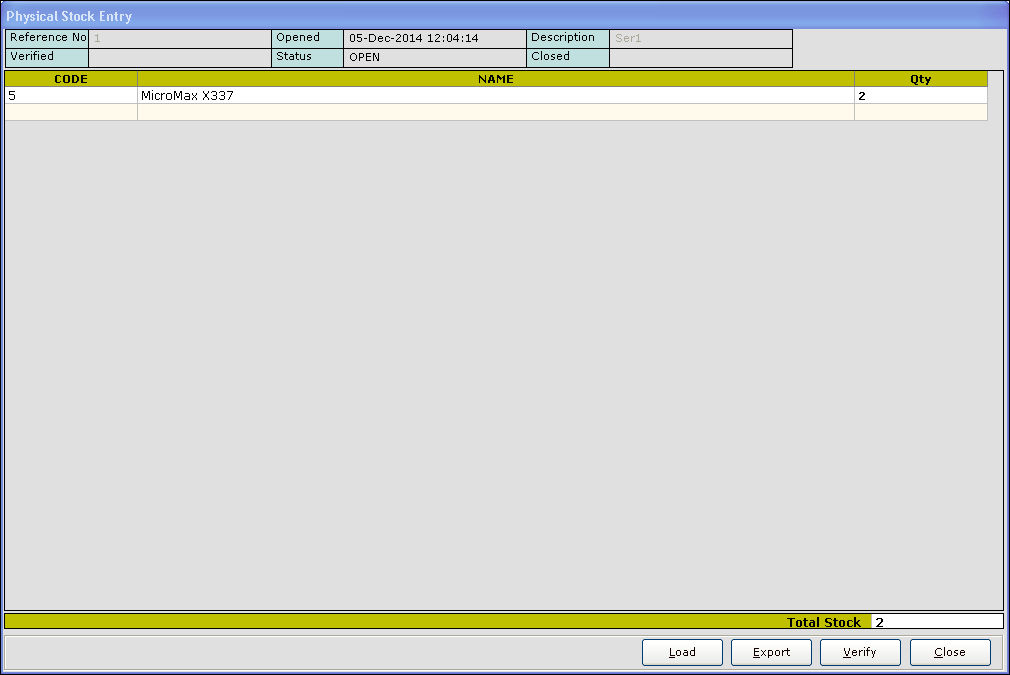
7. Press F4 or click Open. The Physical stock entry screen is displayed. A blank physical stock entry screen in displayed as the option Create a new blank physical inventory count for manual entry is selected under Group selection.

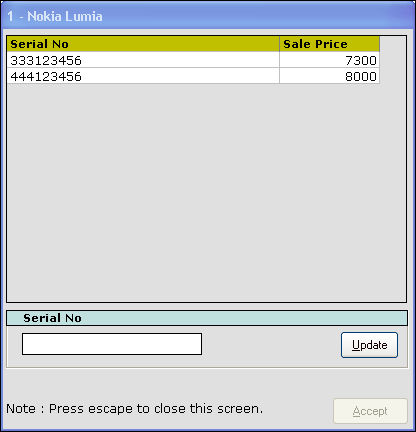
8. In the Code column, press Enter. The item LOV is displayed. Select the item from the LOV. When you place the cursor or click in the Qty column, the screen for the selected item as shown in the below image is displayed.
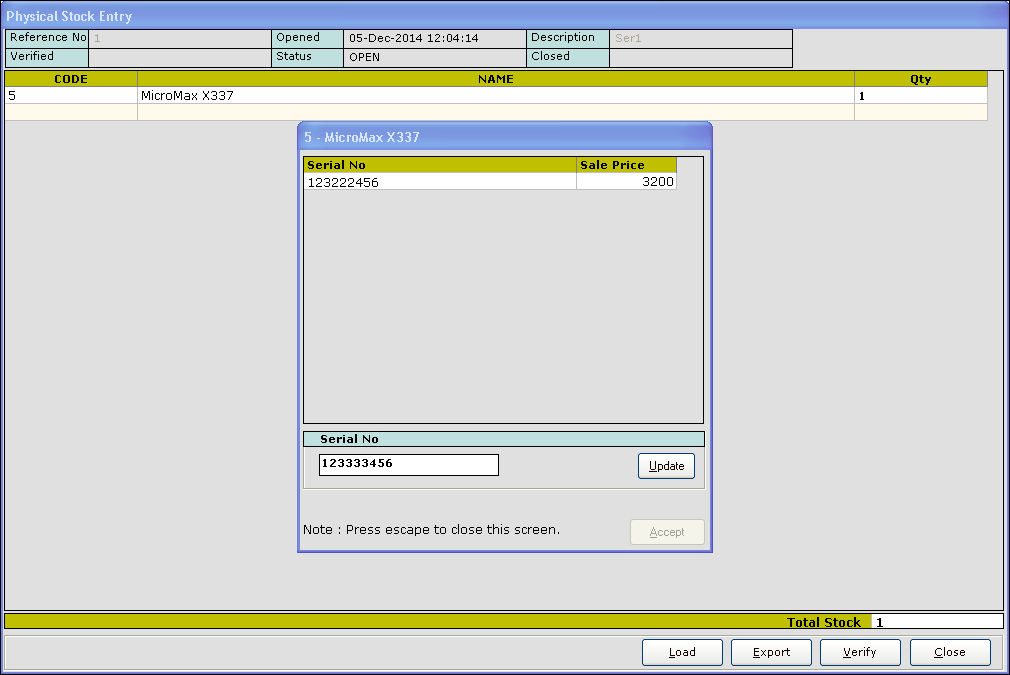
9. In the Serial No field, enter the serial number of the item and click Update.
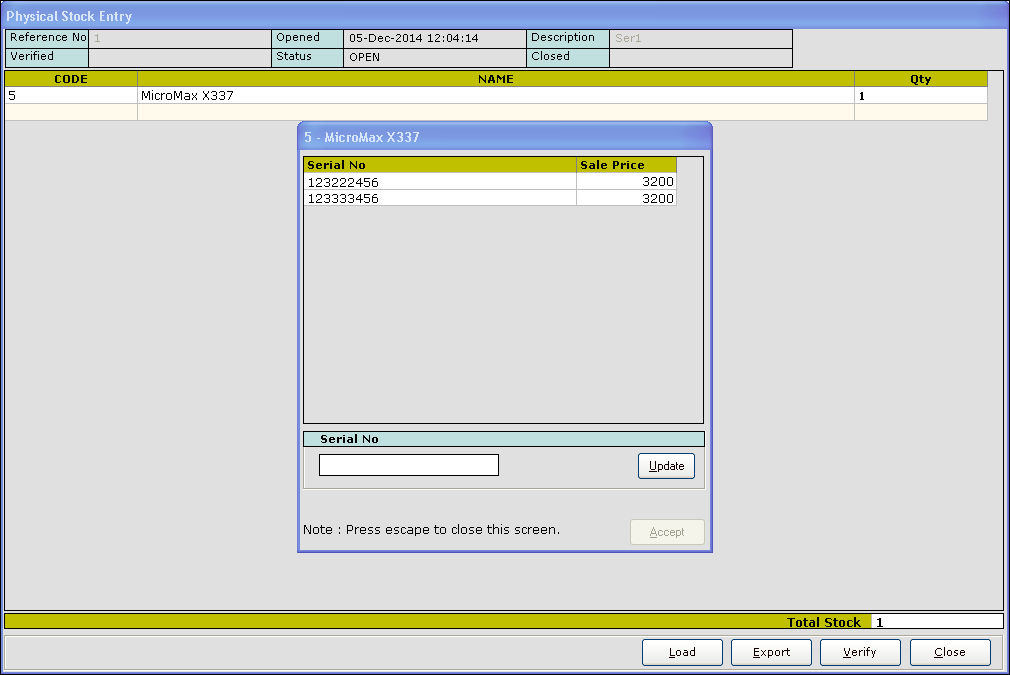
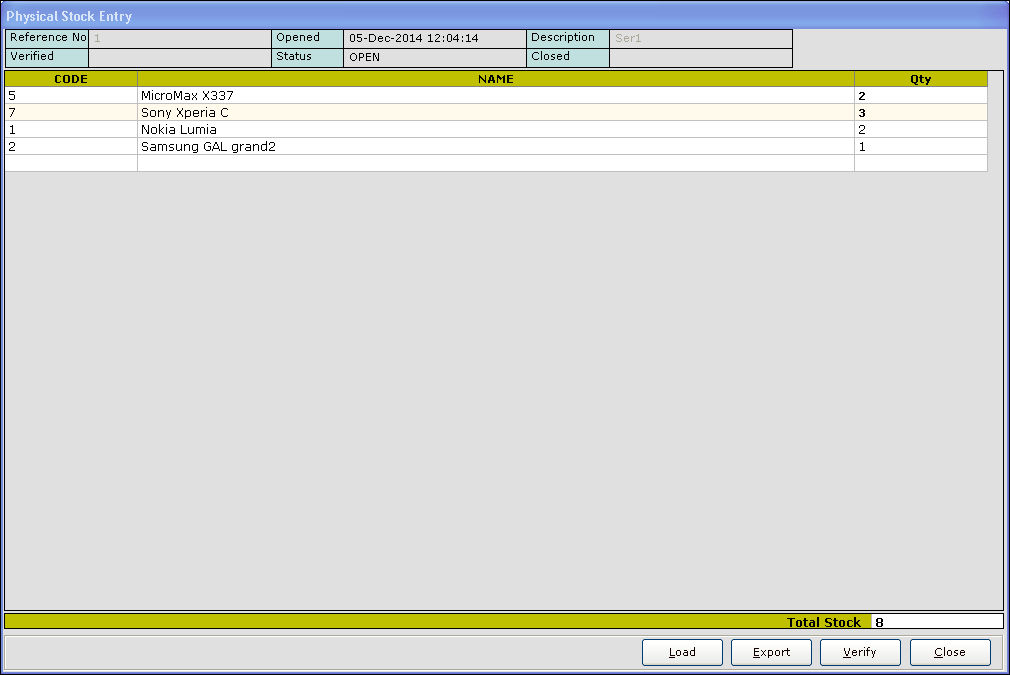
10. Press Esc key. The updated quantity is added in the Qty column of the Physical stock Entry screen.
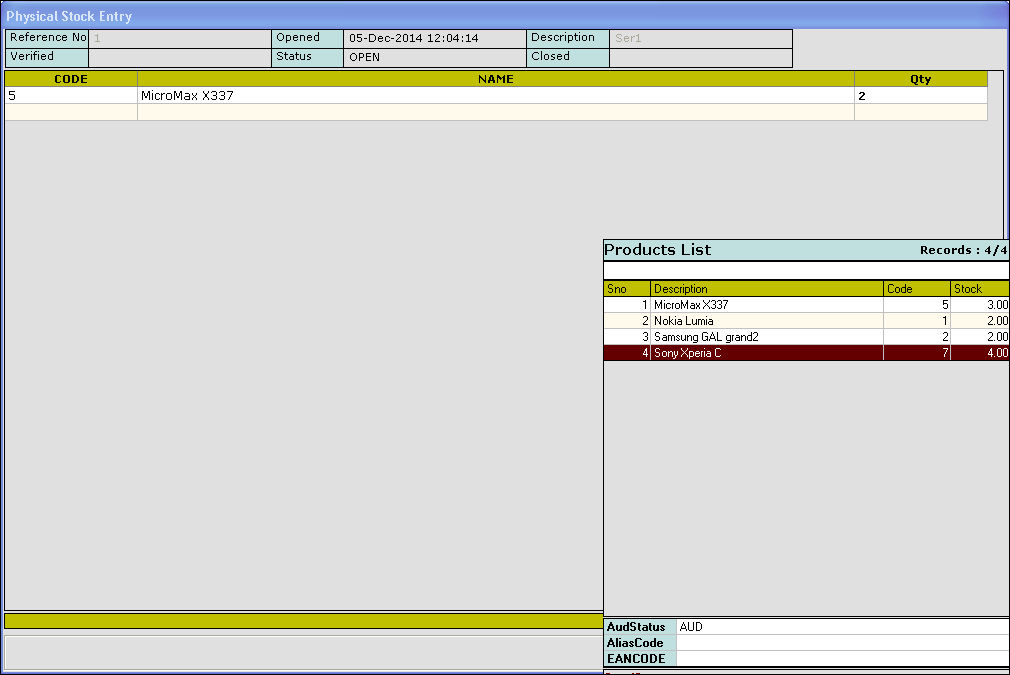
11. Similarly, select another item from the LOV.
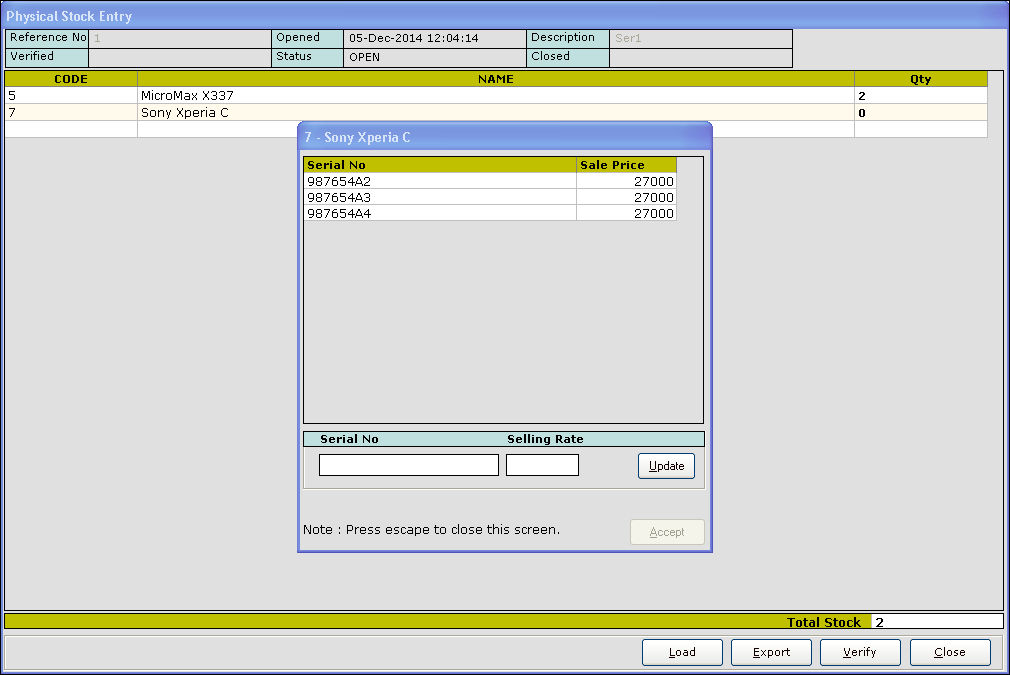
12. Update the quantity for the selected item.
Whenever you enter a new serial number which is not stored in the application, the system prompts you to enter the selling price for the new item. This is illustrated in the below images (for the case Nokia Lumia).
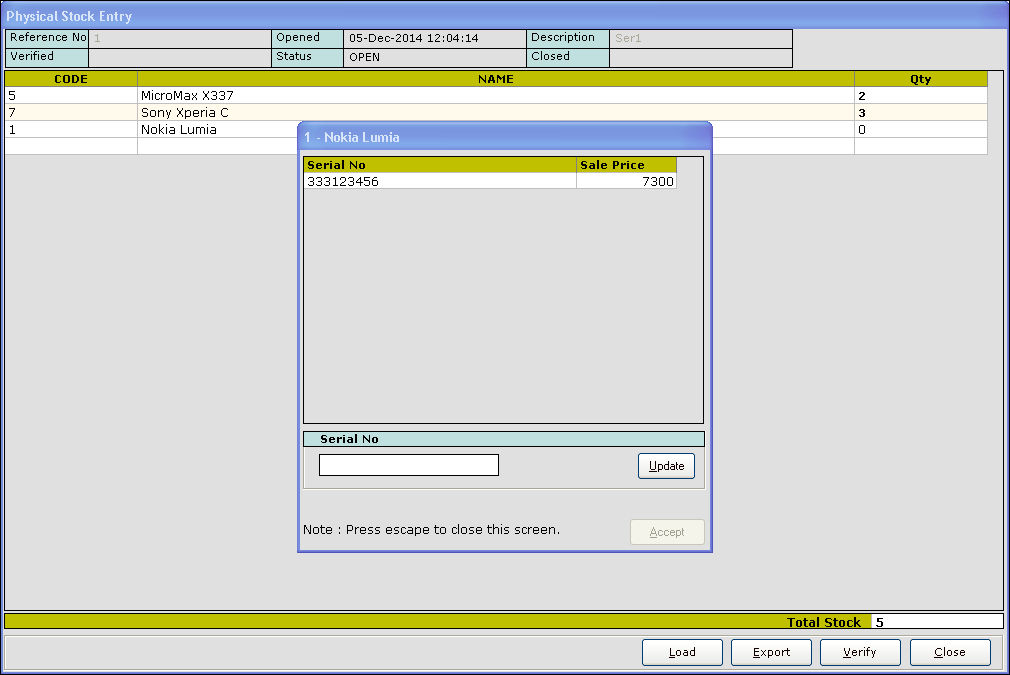
The serial number 333123456 is already stored in the application. Hence, its quantity is updated automatically.
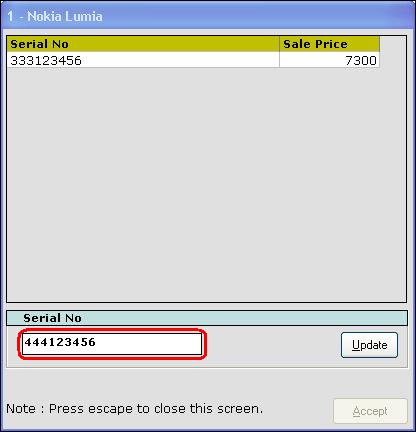
The serial number 444123456 (shown in the above image) is a new serial number. The prompt message Enter the selling rate for the serial number is displayed.
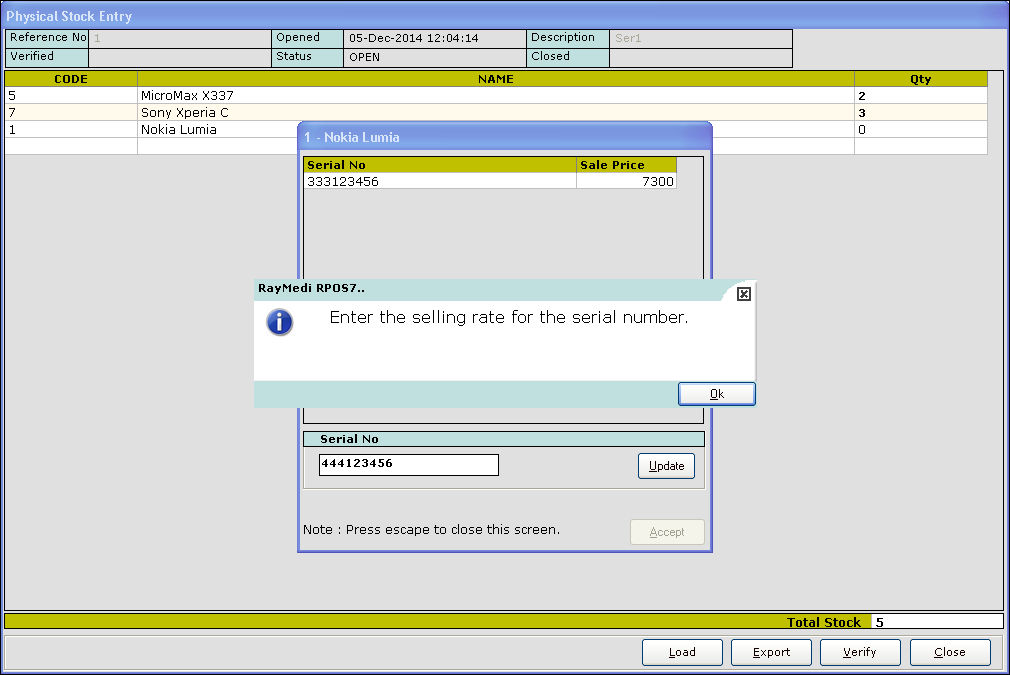
13. Click OK. The Selling Rate field is displayed.
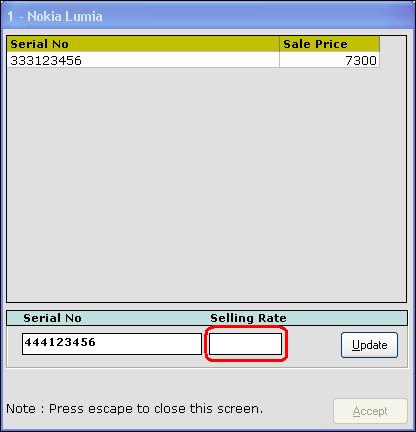
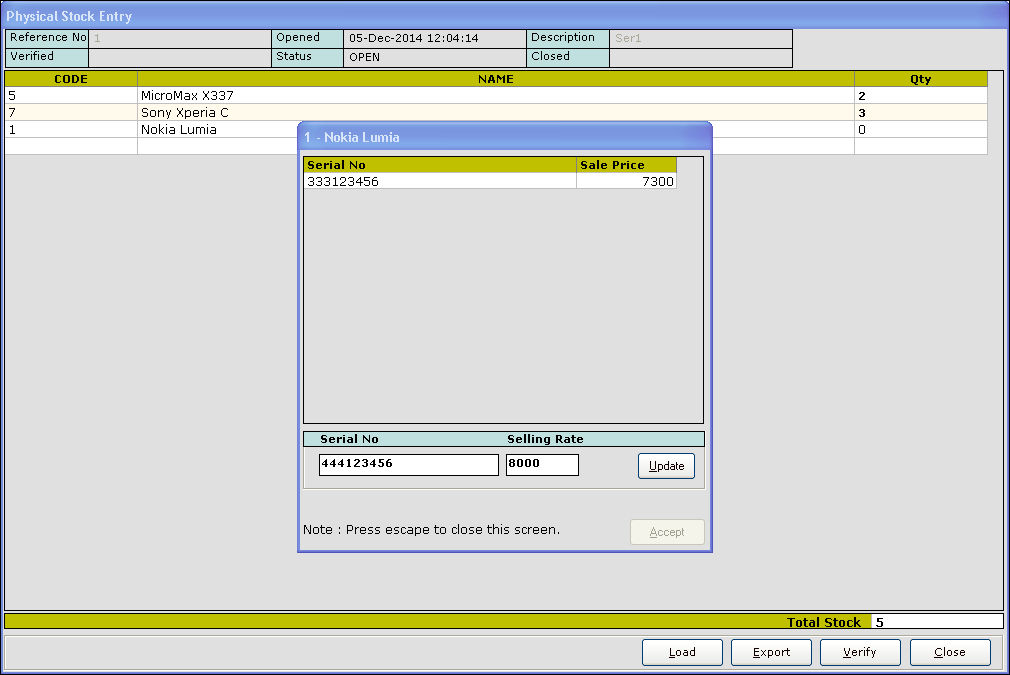
14. In the Selling Rate field, enter the selling price for the new serial number. Click Update.
The updated quantity is added in the physical stock entry screen. Similarly, load more items.
15. Click Verify. The difference between the current quantity (available in system) and physical quantity (available in hand) is displayed in the Diff column.
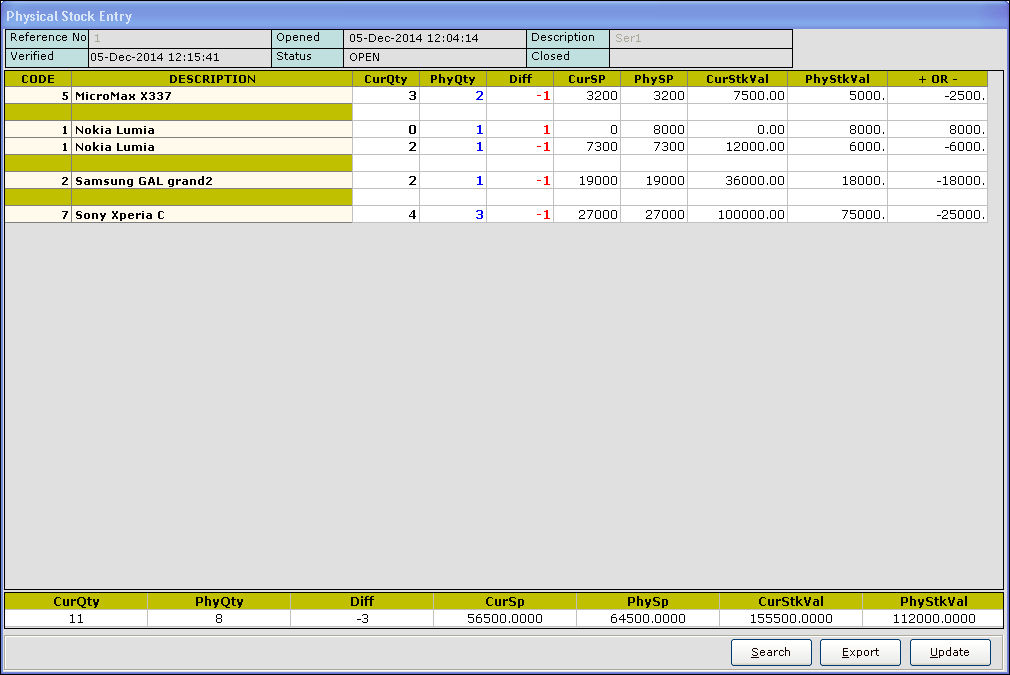
16. Click Update to update the physically entered values.
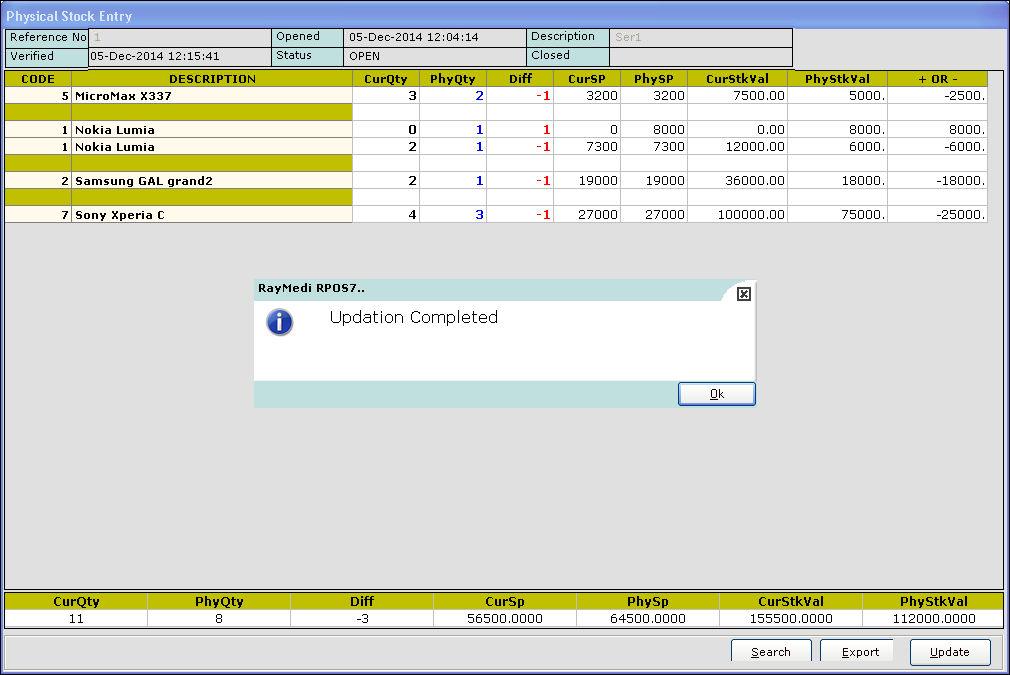
17. A confirmation message Updation completed is displayed. Click OK.
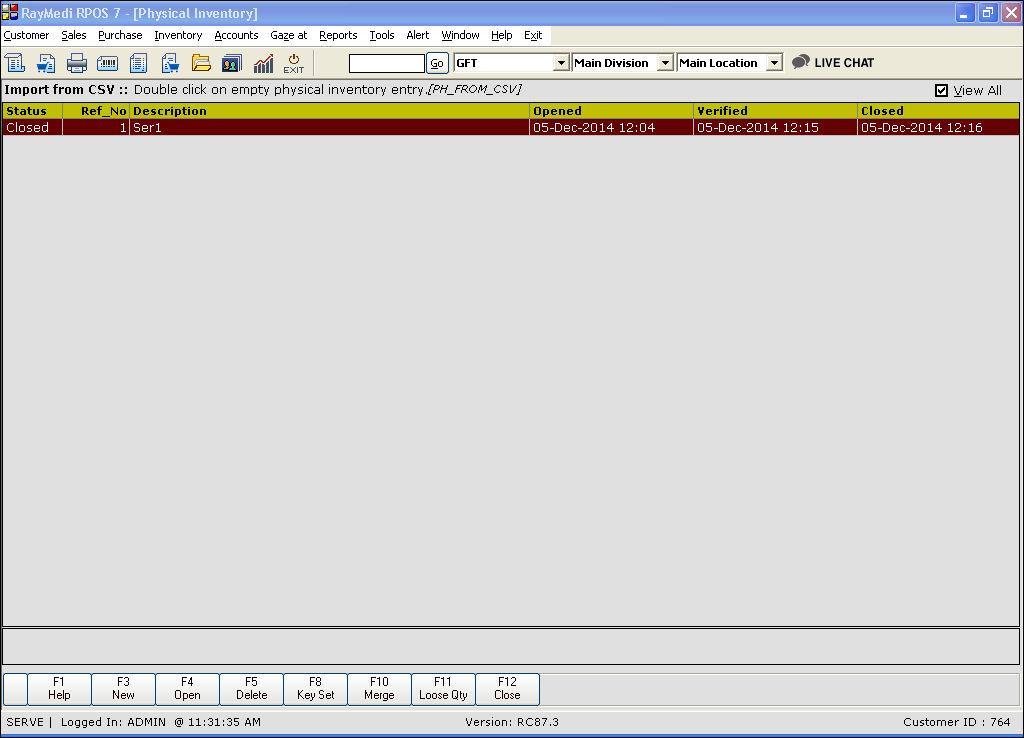
18. The status for the above physical entry is closed as shown in the above image.
1. Click Inventory >> Physical Inventory. The Physical inventory screen is displayed.
2. Press F3 or click New. The Physical inventory screen is displayed.
3. In the Item Type field, select the option Serialized.
4. In the Description / User Reference Number field, enter your description for the form.
5. In the Generation Selection section,the option Create a new blank physical inventory count for manual entry is selected for illustration.
6. Click Generate. A confirmation message is displayed. Click Yes. An entry for the above physical stock selection is created with a Reference number.
7. Press F4 or click Open. The Physical stock entry screen is displayed. A blank physical stock entry screen in displayed as the option Create a new blank physical inventory count for manual entry is selected under Group selection.
8. In the Code column, press Enter. The item LOV is displayed. Select the item from the LOV. When you place the cursor or click in the Qty column, the screen for the selected item as shown in the below image is displayed.
9. In the Serial No field, enter the serial number of the item and click Update.
10. Press Esc key. The updated quantity is added in the Qty column of the Physical stock Entry screen.
11. Similarly, select another item from the LOV.
12. Update the quantity for the selected item.
Whenever you enter a new serial number which is not stored in the application, the system prompts you to enter the selling price for the new item. This is illustrated in the below images (for the case Nokia Lumia).
The serial number 333123456 is already stored in the application. Hence, its quantity is updated automatically.
The serial number 444123456 (shown in the above image) is a new serial number. The prompt message Enter the selling rate for the serial number is displayed.
13. Click OK. The Selling Rate field is displayed.
14. In the Selling Rate field, enter the selling price for the new serial number. Click Update.
The updated quantity is added in the physical stock entry screen. Similarly, load more items.
15. Click Verify. The difference between the current quantity (available in system) and physical quantity (available in hand) is displayed in the Diff column.
16. Click Update to update the physically entered values.
17. A confirmation message Updation completed is displayed. Click OK.
18. The status for the above physical entry is closed as shown in the above image.
Related Articles
Introduction of Physical Inventory
Introduction Physical inventory refers to the stock of the items physically available in the store. In other words, it is a process of physically counting the inventory i.e. taking the actual count of the stock manually. This is usually done in the ...How to perform Stock taking via bar-code scanning from Physical inventory screen?
Physical inventory - Barcode scanning Use this option if you want to take the stock count by barcode scanning. This option is not available for serialised items. The steps for Standard items are illustrated below. 1. Click Inventory >> Physical ...Stock Ledger
Introduction Stock Ledger is a record which shows the stock details including the opening stock, closing stock, in stock and out stock of the items. For each item, you can also view the transaction history including purchase, sales, stock in hand, ...Stock Repost
Stock Repost Purpose: The purpose of stock repost in a POS system is to update the inventory levels of a particular product. When a product is sold, the POS system reduces the inventory level of that product in the system. Stock repost can help to ...Stock Report - Lot Number
Stock Report - Lot Number Purpose: Traceability: Lot numbers provide a unique identifier for batches of products. Checking stock based on Lot numbers allows you to trace the origin and history of each batch, which is crucial in industries like ...