How to perform stock taking for standard items?
Standard items
1. Click Inventory >> Physical Inventory. The Physical inventory screen is displayed.
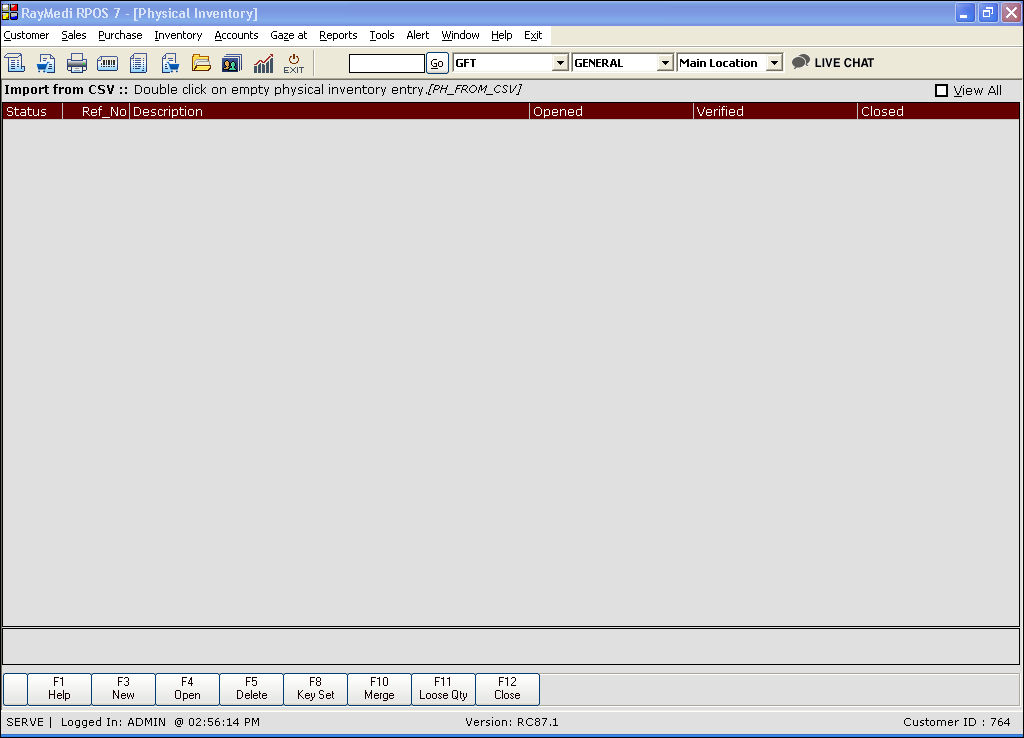
2. Press F3 or click New. The Physical inventory screen is displayed.
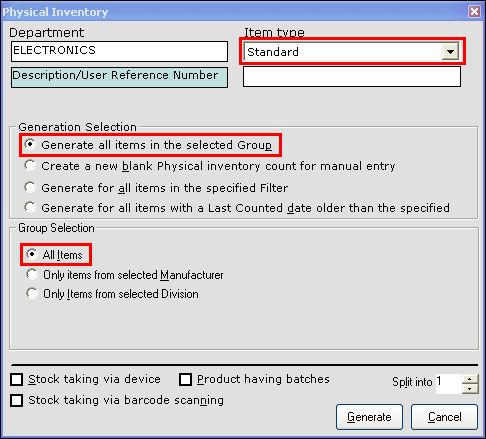
3. In the Item Type field, select the option Standard.
4. In the Generation Selection section, select from the following options:
a. Generate all items in the selected group.
b. Create a new blank physical inventory count for manual entry.
c. Generate for all items in the specified filter.
d. Generate for all items with a last counted date older than the specified.
For illustration, the option Generate all items in the selected group is selected.
5. Stock taking options
For stock taking, select any of the following options.
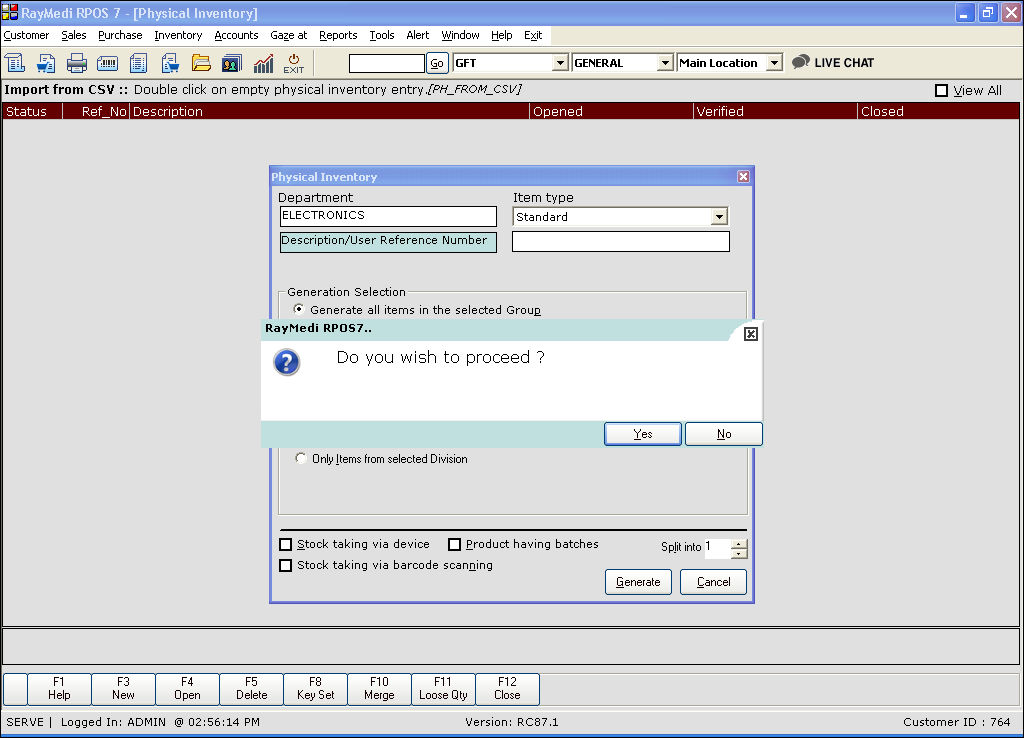
A confirmation message is displayed. Click Yes. An entry for the above physical stock selection is created with a Reference number.
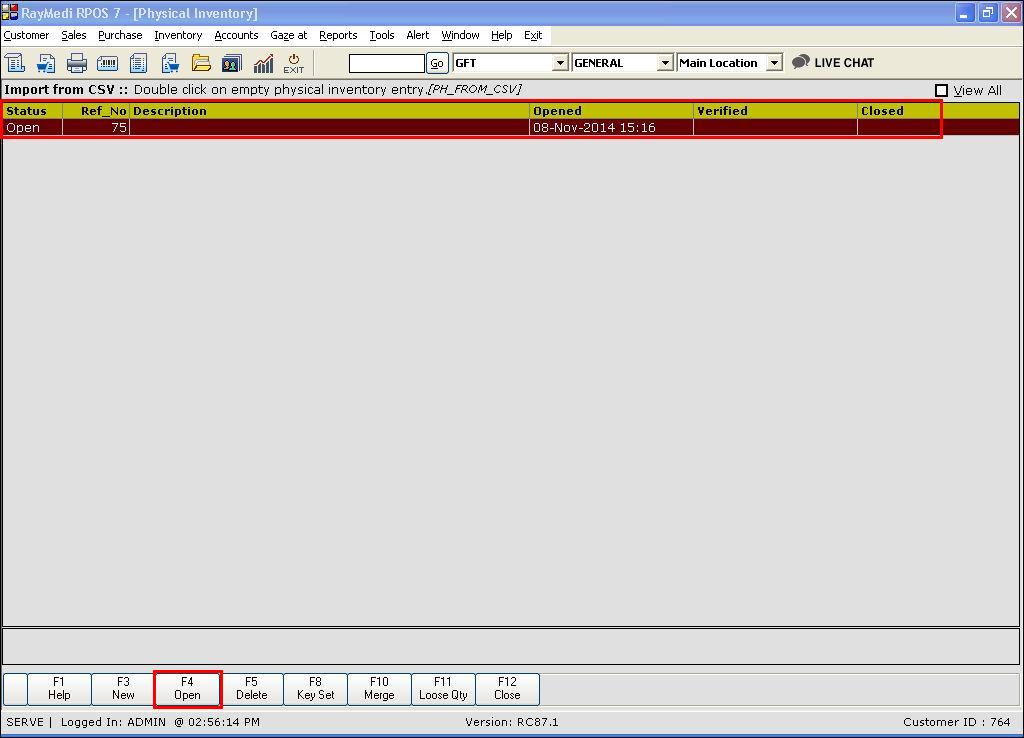
7. Press F4 or click Open. The Physical stock entry screen is displayed. All items are displayed in the screen as the option All items is selected under Group selection.
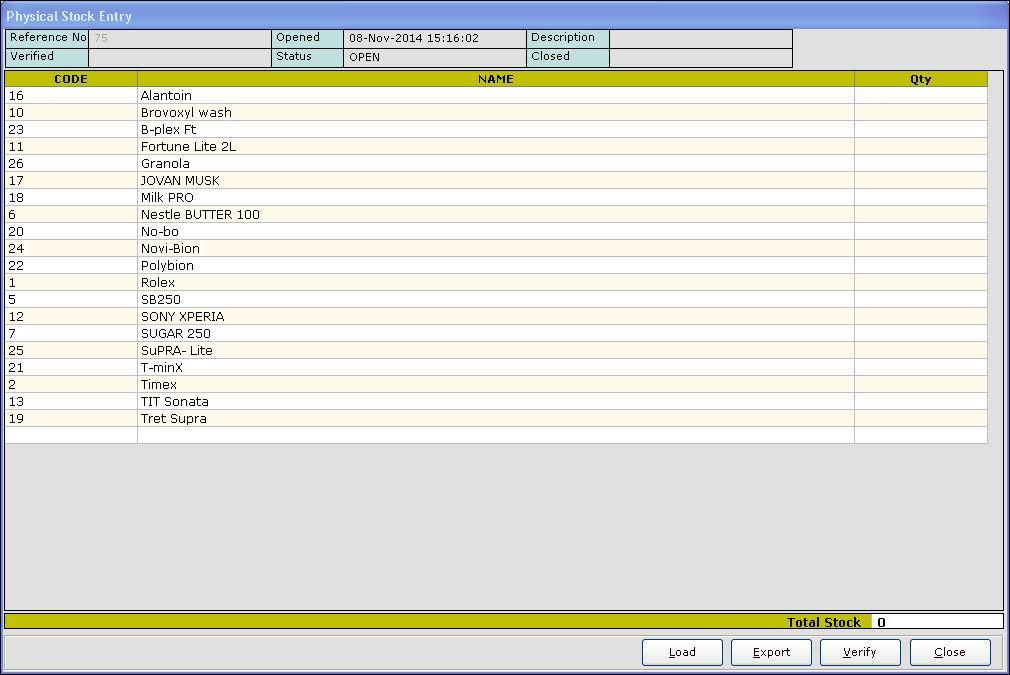
When you place the cursor or click in the Qty column, the screen for the respective item as shown in the below image is displayed.
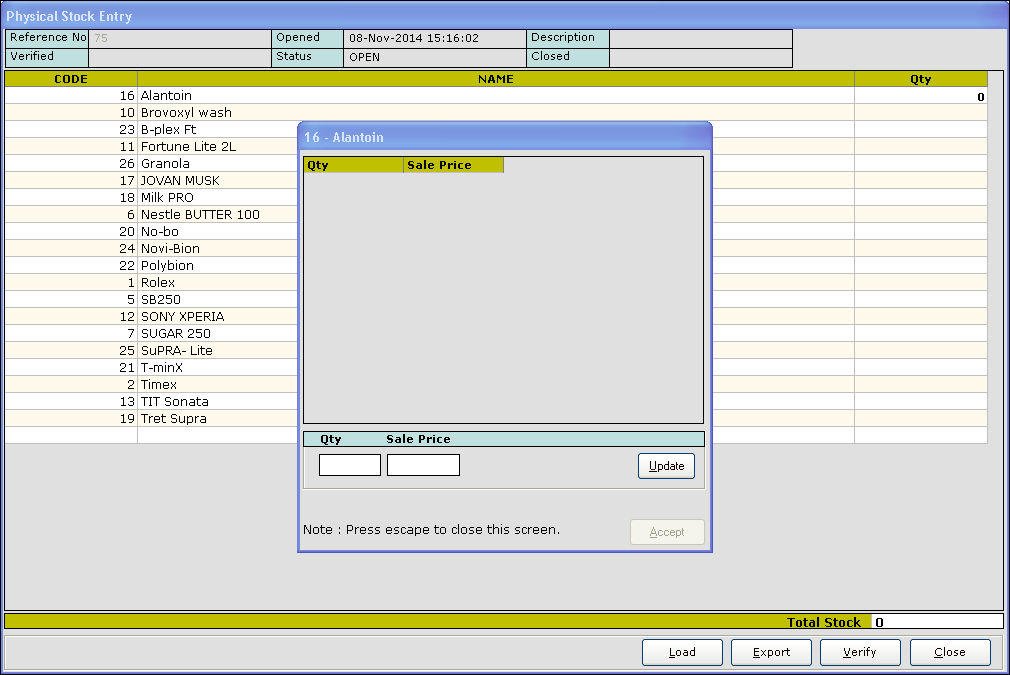
8. In the Qty field, enter the physical quantity of the item.
9. In the Sale Price field, enter the selling price of the item.
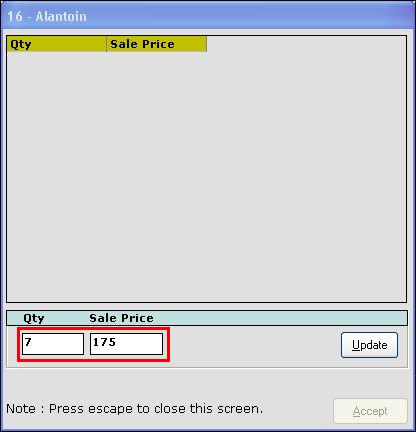
10. Click Update. The values are added as shown in the below image.
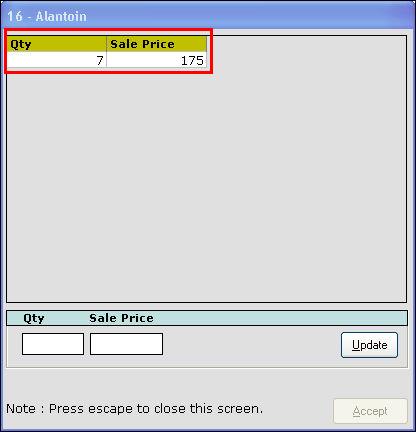
11. Press Esc key. The value for the corresponding item is updated in the Physical Stock Entry screen.
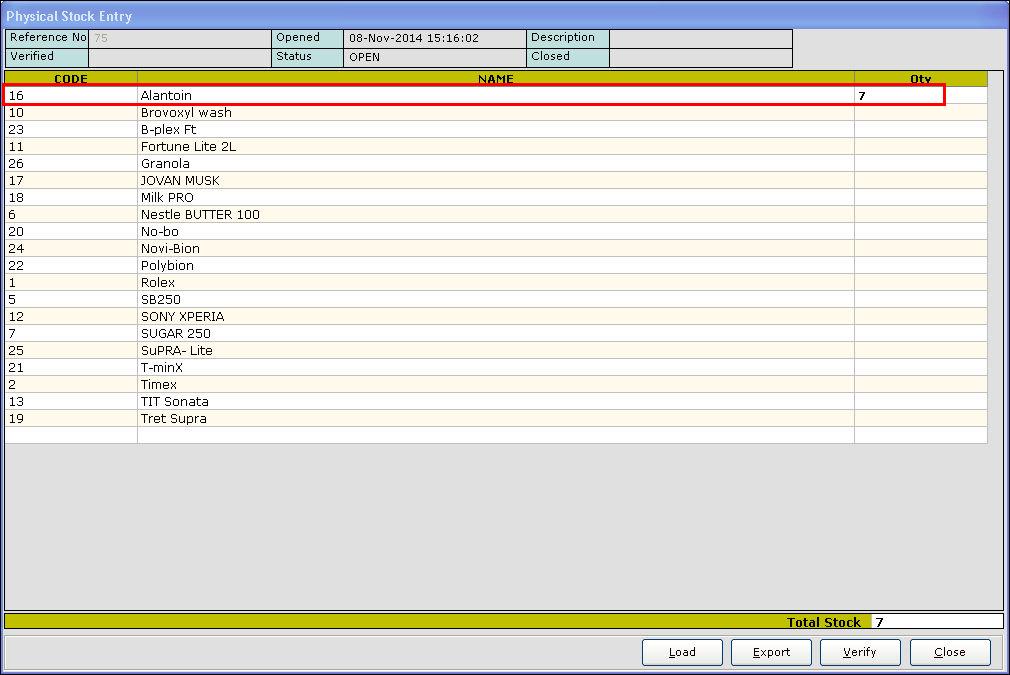
12. Similarly, update the values for the other items.
Note: If no value is entered, the value is updated as zero. The total stock is displayed in the bottom of the screen.
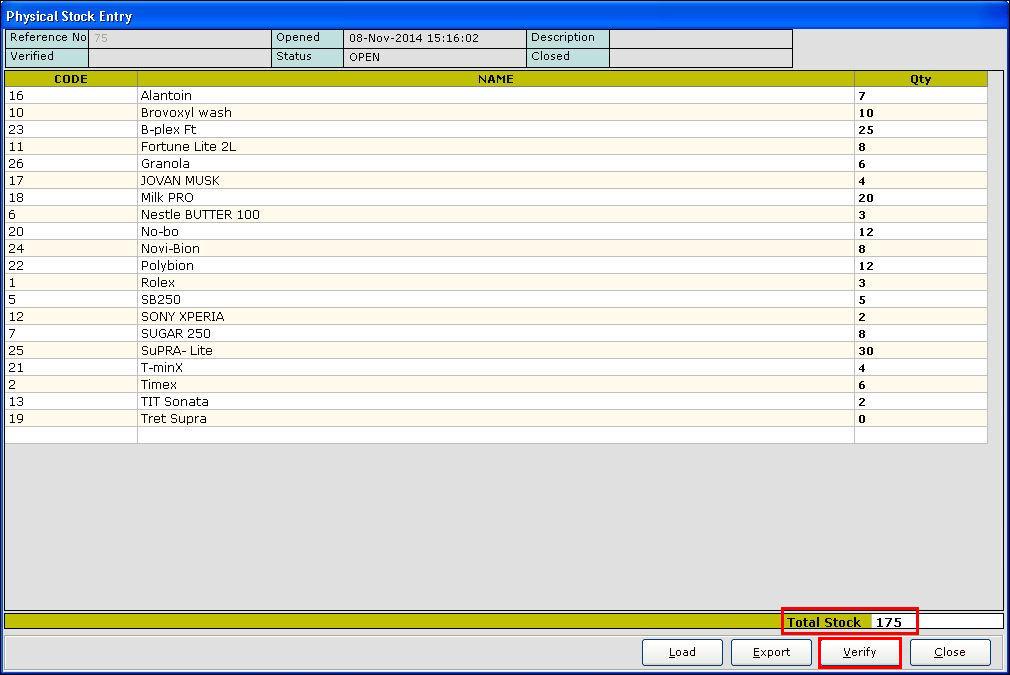
13. click verify. For details on Load function, click here
14. The difference between the current quantity (available in system) and physical quantity (available in hand) is displayed in the Diff column.
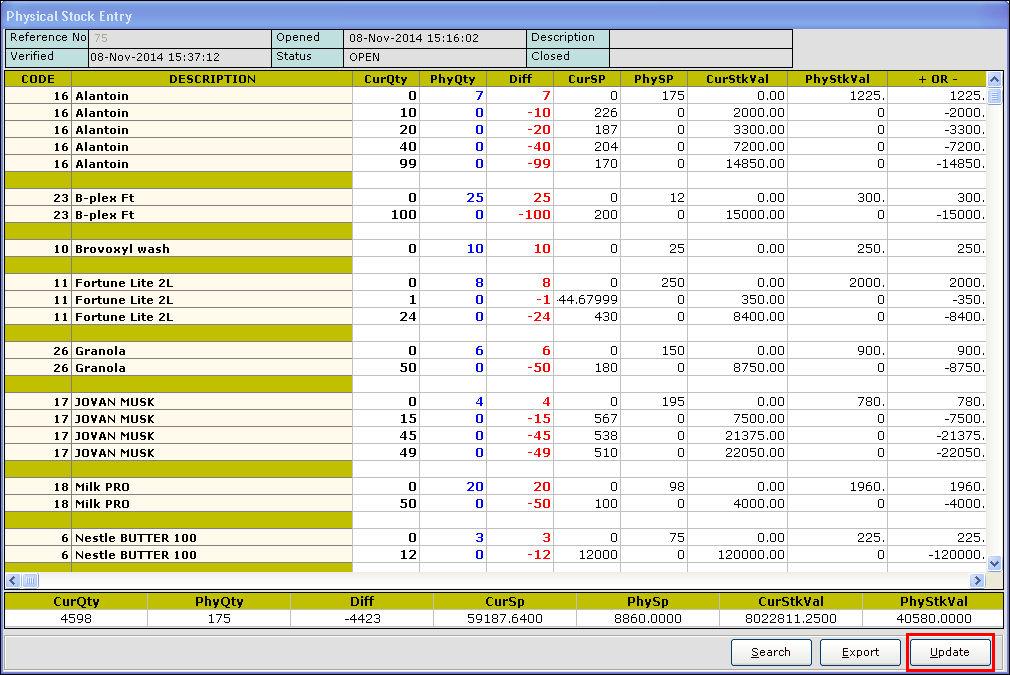
For details on Search function, click here
15. Click Update.
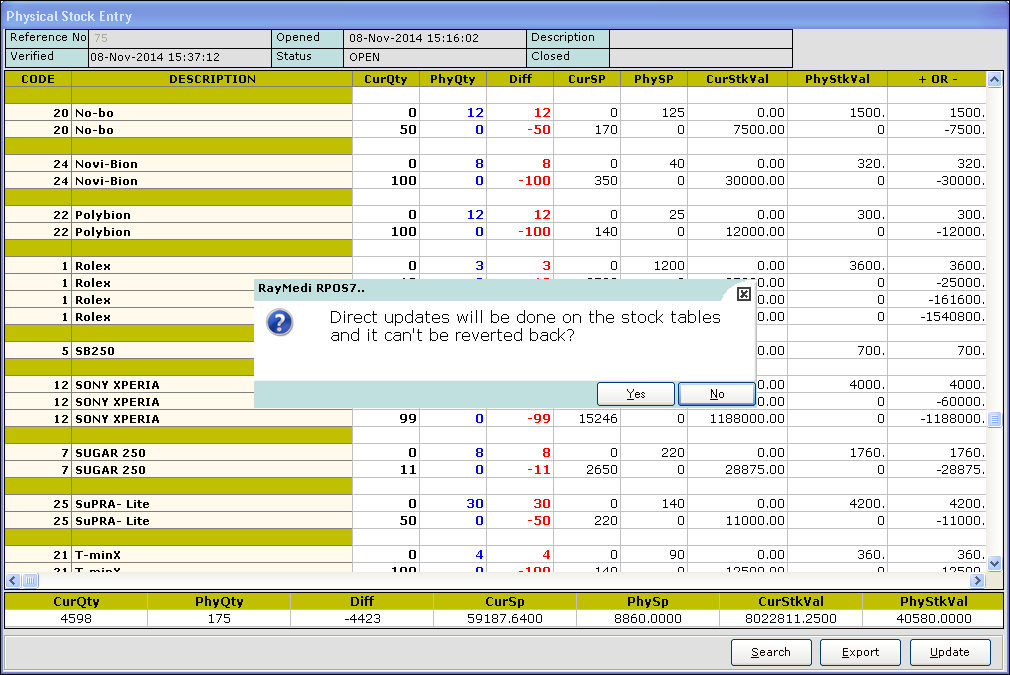
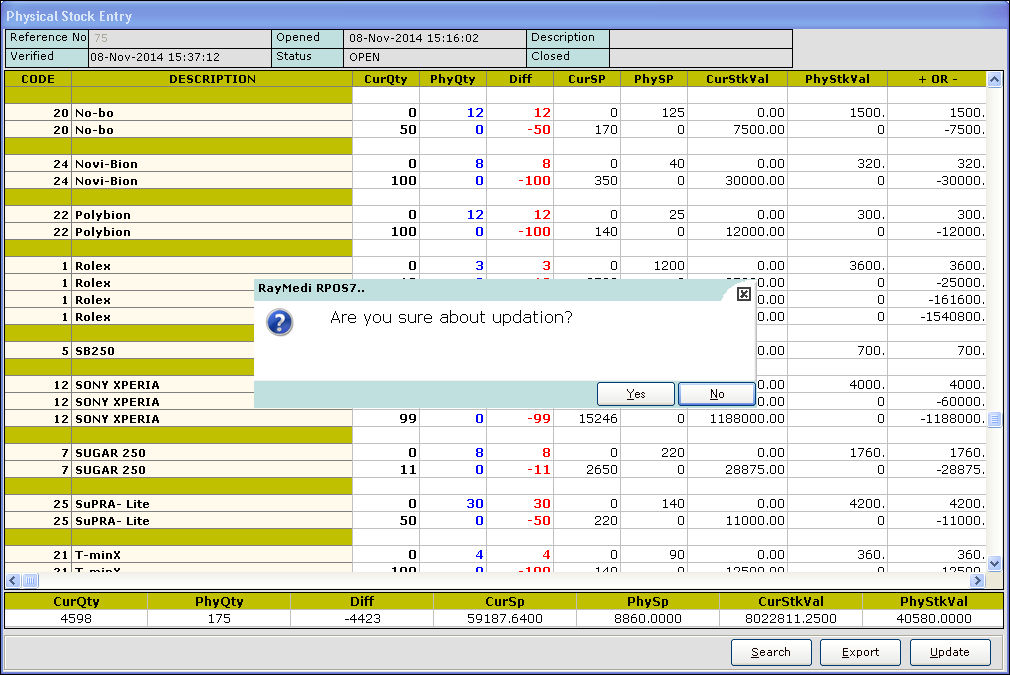
16. A confirmation message for updation is displayed. Click Yes.
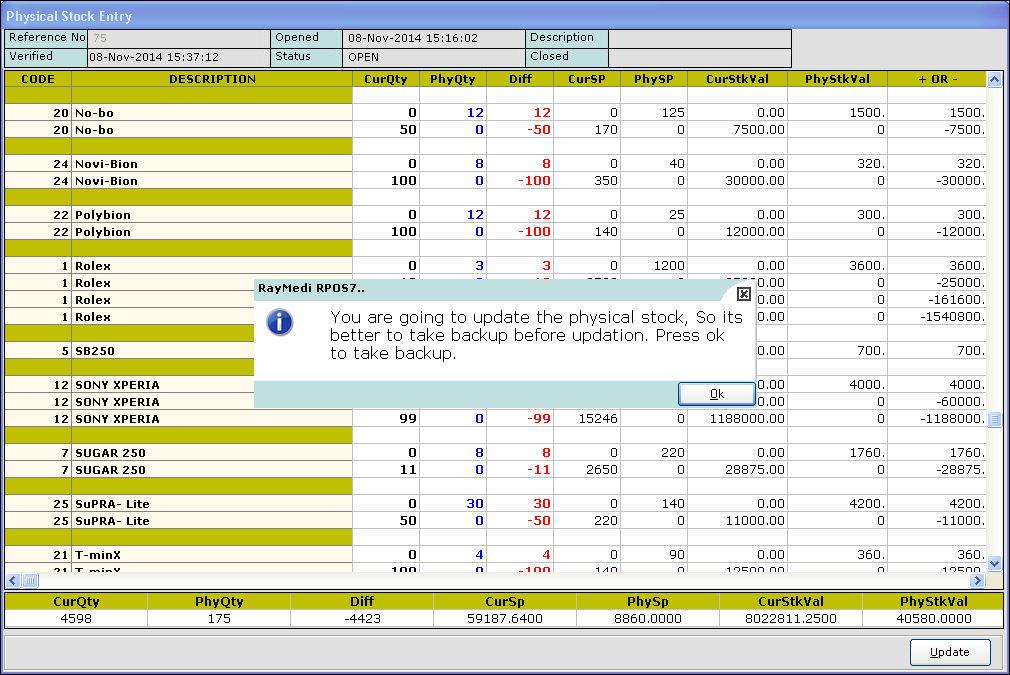
17. A confirmation message to take the back up is displayed. Click OK.
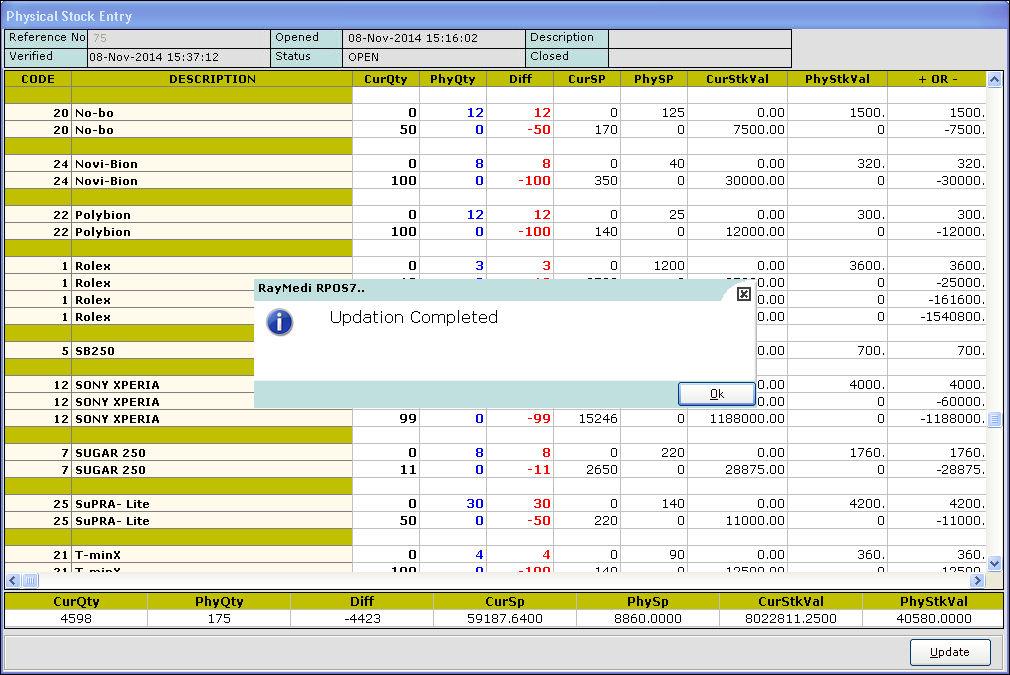
18. The backup process is initiated and the updation gets completed.
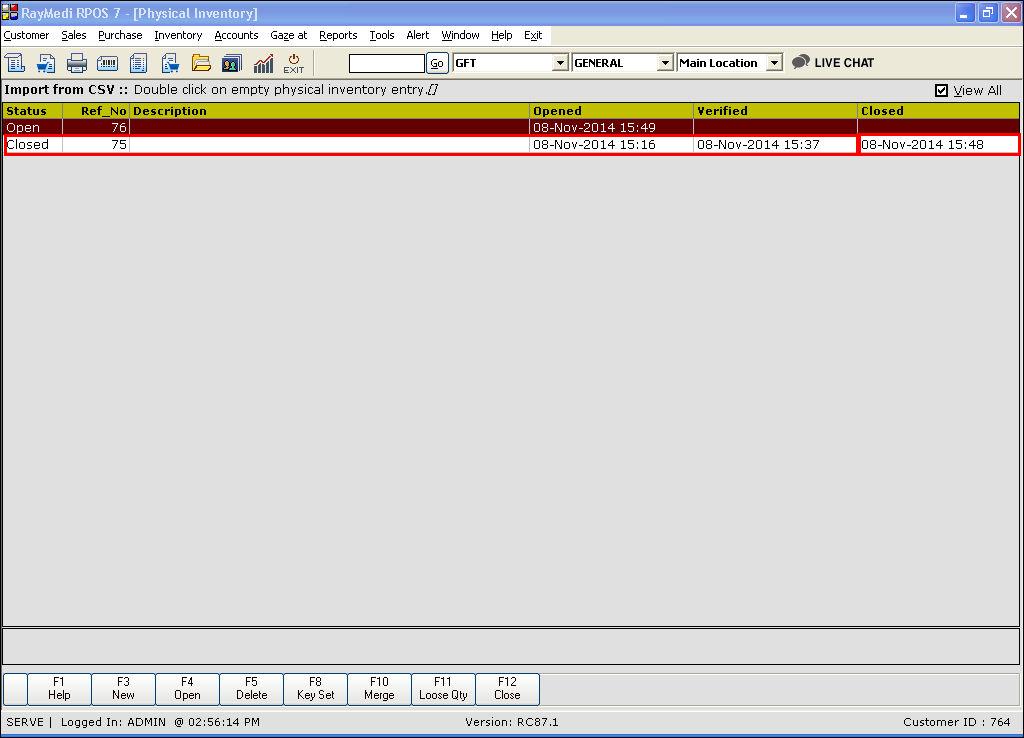
19. The status of the above physical stock reference is closed.
Other features
1. Search option. For details, click here
2. Load option. For details, click here
1. Click Inventory >> Physical Inventory. The Physical inventory screen is displayed.
2. Press F3 or click New. The Physical inventory screen is displayed.
3. In the Item Type field, select the option Standard.
4. In the Generation Selection section, select from the following options:
a. Generate all items in the selected group.
b. Create a new blank physical inventory count for manual entry.
c. Generate for all items in the specified filter.
d. Generate for all items with a last counted date older than the specified.
For illustration, the option Generate all items in the selected group is selected.
5. Stock taking options
For stock taking, select any of the following options.
- Stock taking via device
- Stock taking via barcode scanning
- Product having batches
For more details on stock taking via barcode scanning, click here
For more details on Product having batches, click here
A confirmation message is displayed. Click Yes. An entry for the above physical stock selection is created with a Reference number.
7. Press F4 or click Open. The Physical stock entry screen is displayed. All items are displayed in the screen as the option All items is selected under Group selection.
When you place the cursor or click in the Qty column, the screen for the respective item as shown in the below image is displayed.
8. In the Qty field, enter the physical quantity of the item.
9. In the Sale Price field, enter the selling price of the item.
10. Click Update. The values are added as shown in the below image.
11. Press Esc key. The value for the corresponding item is updated in the Physical Stock Entry screen.
12. Similarly, update the values for the other items.
Note: If no value is entered, the value is updated as zero. The total stock is displayed in the bottom of the screen.
13. click verify. For details on Load function, click here
14. The difference between the current quantity (available in system) and physical quantity (available in hand) is displayed in the Diff column.
For details on Search function, click here
15. Click Update.
16. A confirmation message for updation is displayed. Click Yes.
17. A confirmation message to take the back up is displayed. Click OK.
18. The backup process is initiated and the updation gets completed.
19. The status of the above physical stock reference is closed.
Other features
1. Search option. For details, click here
2. Load option. For details, click here
Related Articles
How to perform Stock taking via bar-code scanning from Physical inventory screen?
Physical inventory - Barcode scanning Use this option if you want to take the stock count by barcode scanning. This option is not available for serialised items. The steps for Standard items are illustrated below. 1. Click Inventory >> Physical ...Stock Repost
Stock Repost Purpose: The purpose of stock repost in a POS system is to update the inventory levels of a particular product. When a product is sold, the POS system reduces the inventory level of that product in the system. Stock repost can help to ...Batch mandatory items Stock taking
Batch items - stock taking 1. Click Inventory >> Physical Inventory. The Physical inventory screen is displayed. 2. Press F3 or click New. The Physical inventory screen is displayed. 3. In the Item Type field, select the option Standard. 4. In ...Product Types for Seed Items
Product Types for Seed Items Purpose: The purpose of using a matrix item in RetailEasy Fertilizer business in POS for trading seed items is to be able to maintain all brands of a particular seed in one item itself in the master entry. This is ...Seed Items
Seed Items Purpose: Within the RetailEasy Fertilizer POS software, the concept of 'seed items' holds valuable advantages, especially for businesses dealing with seed trading. It is recommended to utilize the Matrix item feature for seeds due to the ...